

In this tutorial, I’ll show you how to create a watercolor effect in Photoshop. You’ll learn how to use a layer mask and brushes to achieve a colorful watercolor portrait effect. We’ll use paper texture, watercolor brushes, and filters to mimic watercolor painting effect in Photoshop. Let’s deep dive into it!
Here are the 6 steps to make a hand-painted watercolor picture:
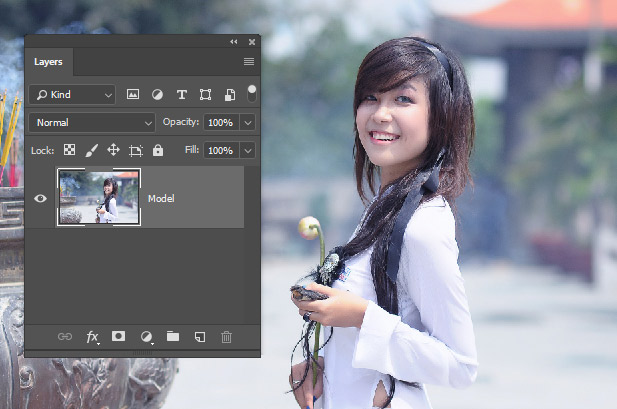
Step 1 – Open the Sample Image
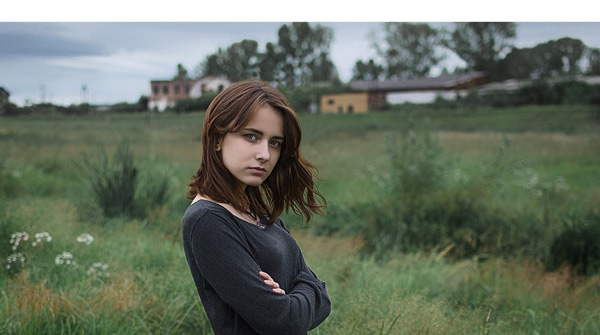
I am using a model image that you can download from Pixabay. You can use any image which you want maybe a portrait, or landscape, etc. And you don’t have to worry about colors or details such as contrast and brightness any image would be fine.
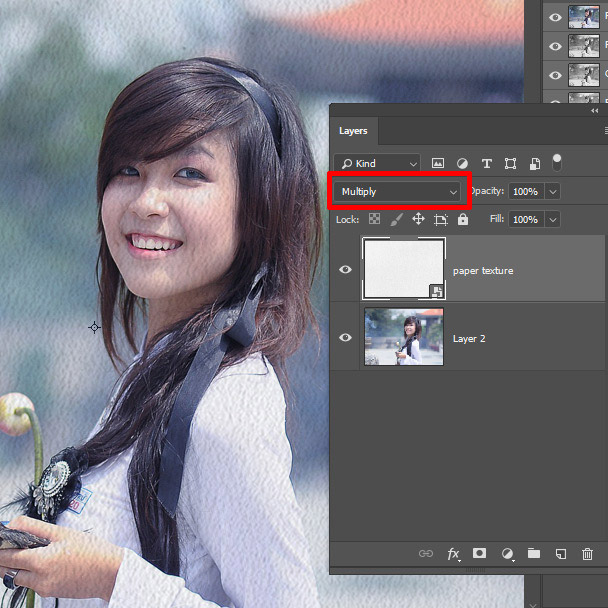
Step 2 – Add a Paper Texture
Once you have the image opened in Photoshop we have to add a paper texture to give the image a paper effect feel so it looks like it is painted on paper or canvas not digitally.
Download the paper texture from Pixabay and then add it on top of the model layer. You can select File > Place Embedded and then add it. You can even transform it so it can fit nicely into the document.
Once you added it, change its blending mode to Multiply so it can blend with the image.
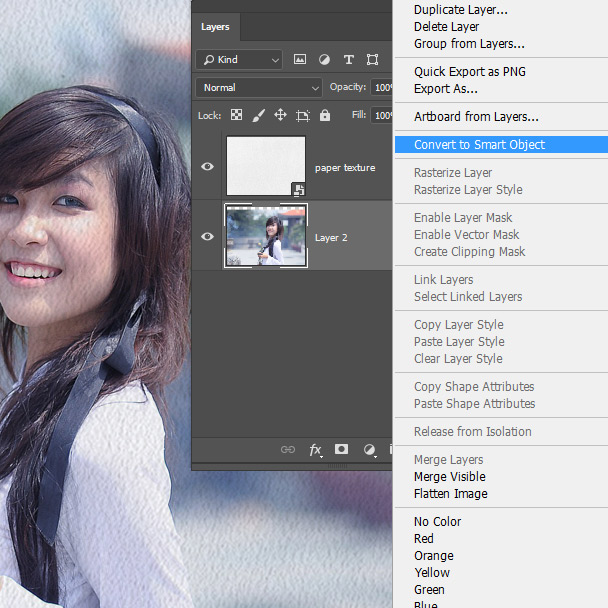
Step 3 – Start Adding Watercolor Effects
Now it’s time to use filters to achieve a painterly look. First, you need to convert the image into Smart Object. Right-click on the image and choose Convert to Smart Ojbect.
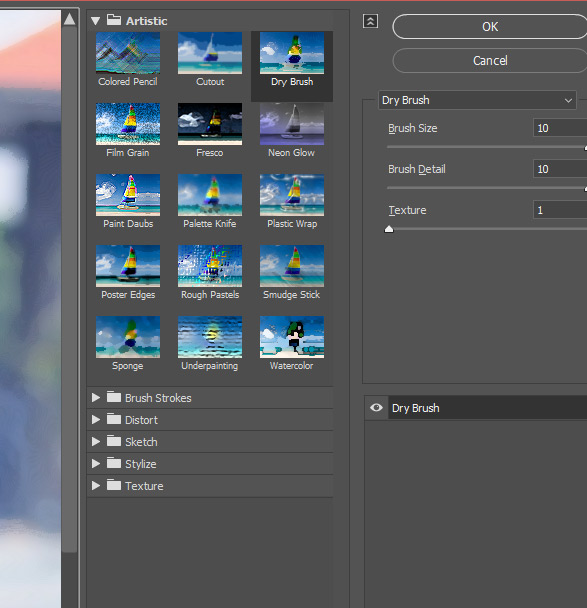
Go to Filter > Filter Gallery > Dry Brush and use the following settings:
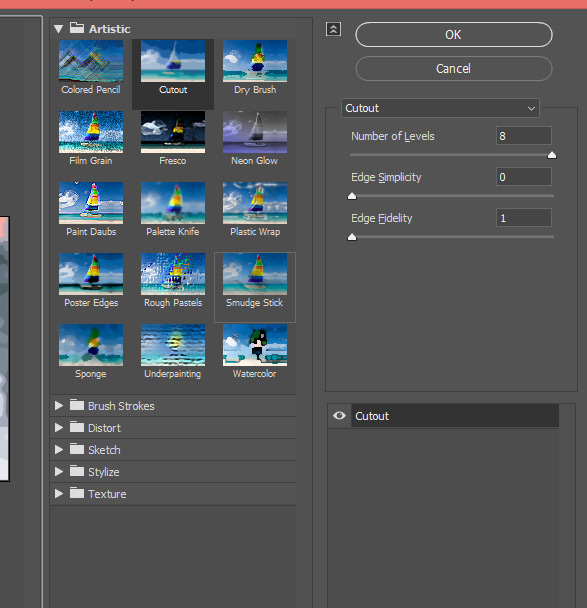
Go to Filter > Filter Gallery > Cut Out and use the values below:
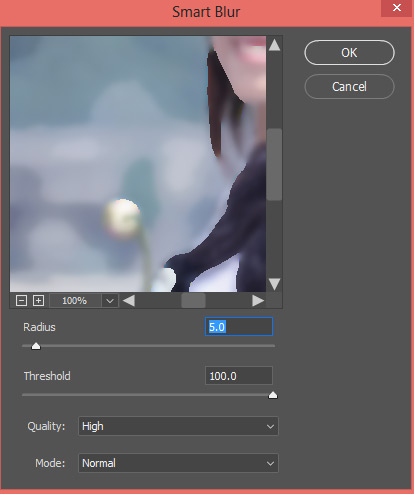
Go to Filter > Blur > Smart Blur use the settings below:
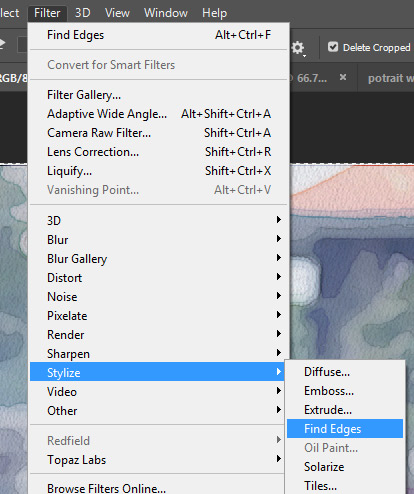
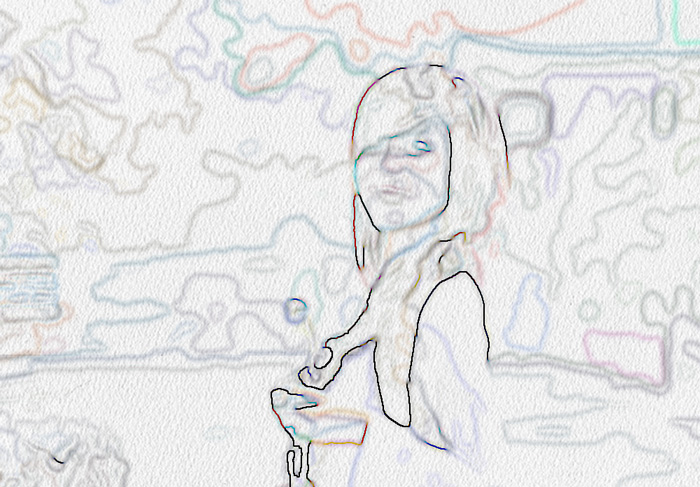
Finally, go to Filter > Stylize > Find Edges.
Results will resemble the below image and we have to edit 2 filters Smart Blur & Find Edges in order to bring back details of the photo. We can do this by editing the filter opacity and blending mode.
Step 4 – Edit Filters To Reveal Watercolor Effects
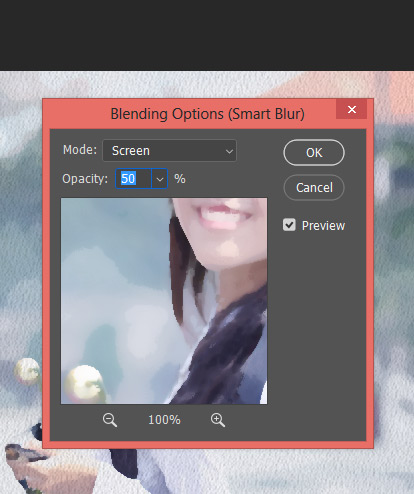
In order to edit filters, you can click on the icon right next to the filter shown below to edit it.

Edit the settings of Smart Blur filter, change the blending mode to Screen and reduce the opacity to 50%. This will brighten the image and reduce the smoothness on the image.
Now edit the settings of Find Edges Filter, change the blending mode to Multiply and reduce the opacity to 63%.

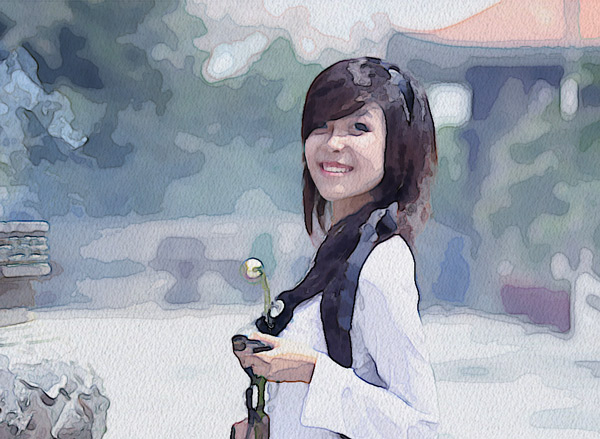
Here are results with an artistic painterly watercolor look:
Step 5 – Prep The Image For Deformation
In order to use watercolor brush stroke, we have to hide the image first and then we can reveal it by applying brush strokes on the layer mask.
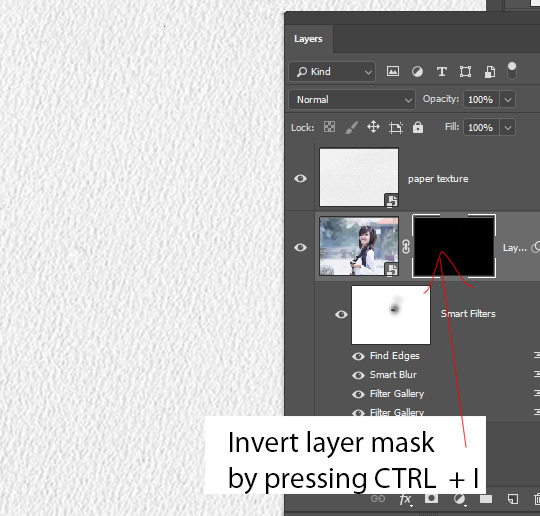
So add a layer mask to the image by clicking on the Add Layer Mask Icon shown below:

Invert the layer mask by pressing CTRL + I to hide the image. You will see the layer mask color will turn into black color.
Step 6 – Deformation with Watercolor Brushes
Without brush strokes, any painting looks incomplete or it is not painting at all. Download the watercolor brushes from here and then use any of them. I use the first one, selected white color and layer mask, then start revealing the image on a gradual basis.
You can see I’ve selected the first brush, then I selected white color and after I selected the layer mask I started painting on the image to reveal the image.
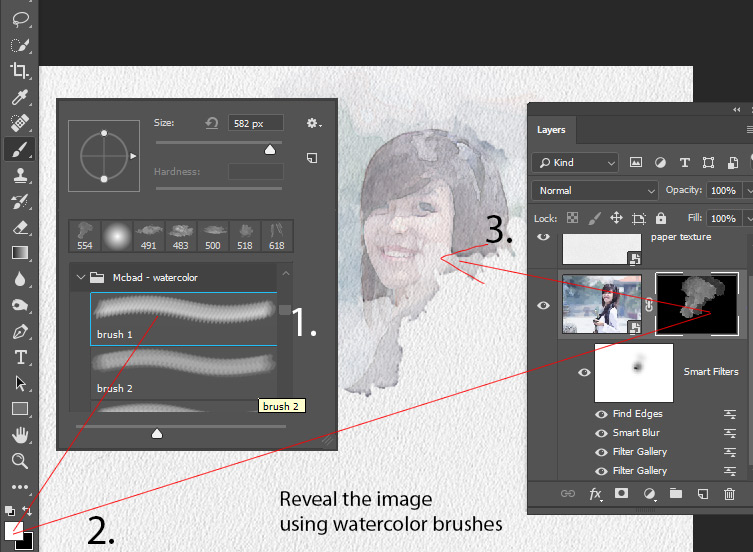
Here you can see how I revealed the image, so it’s a bit different than the original but I just wanted to show you how I did it.
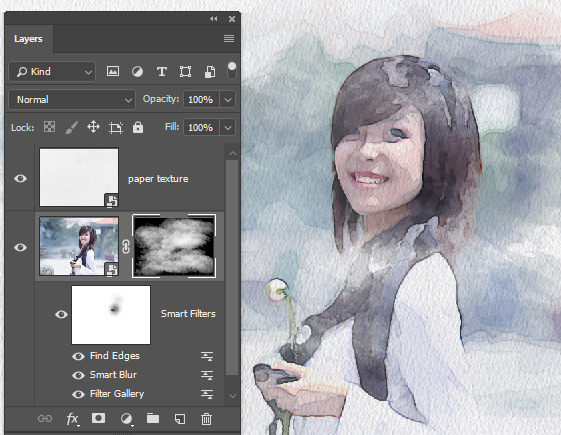
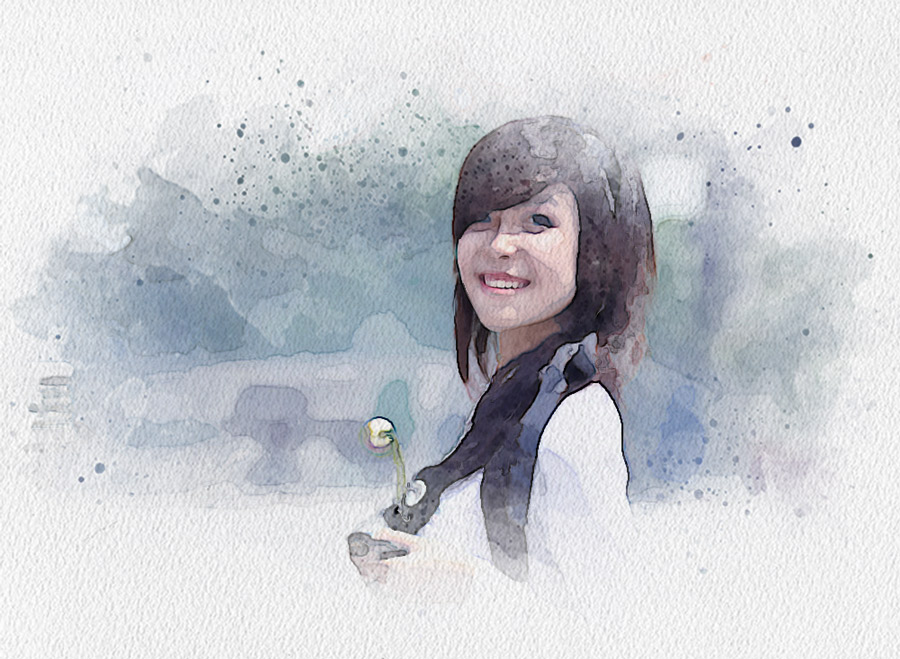
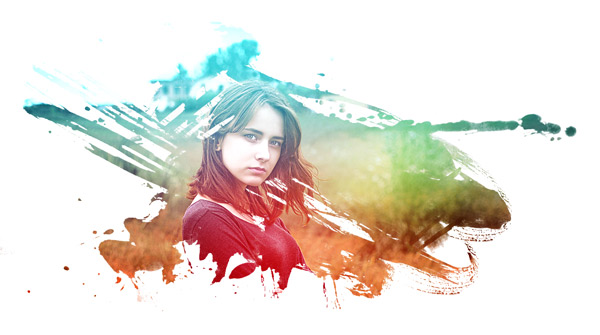
Here is final outcome:

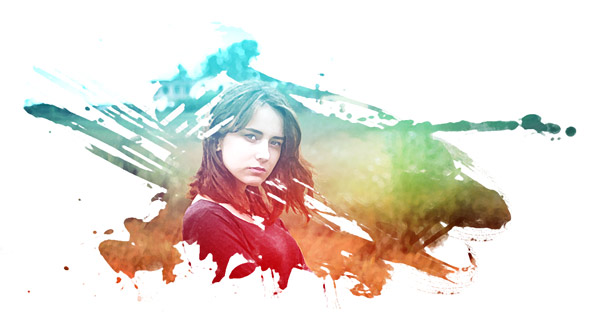
Watercolor Splash Effect Tutorial
Tutorial Resources
Step 1
Create a new document in Photoshop. You can create a new document in Photoshop by selecting File > New . If you want you can also open any image directly and start working on it.
Here are the values:

Step 2
Now place the model image to the main document by selecting File > Place Embedded. Instead of using the model image you can also open your photos. So feel free to choose your own image.
Step 3
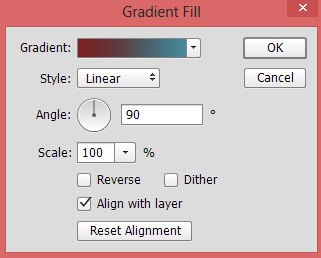
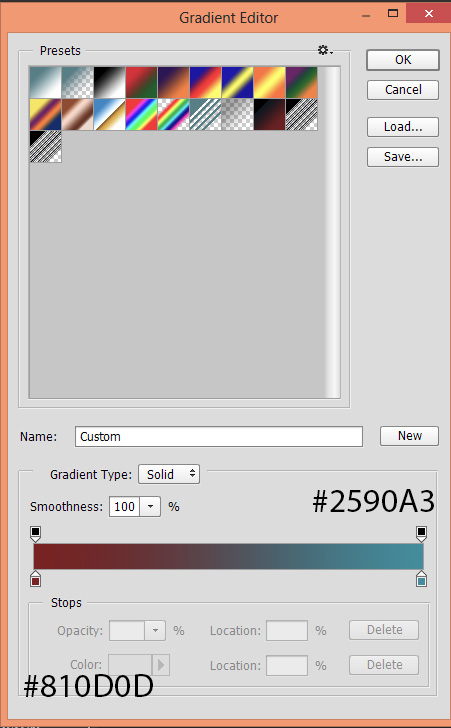
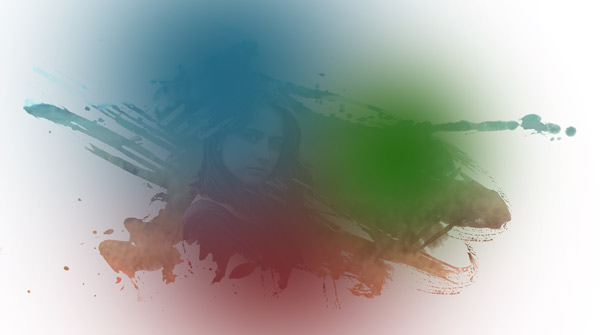
Now I’m going to add basic coloring for the photo using Gradient Fill adjustment layer. Make a Gradient Fill adjustment layer by clicking on third icon at the bottom of layer panel or go to Layer > New Adjustment Layer > Gradient Fill. Now choose the gradient color flow from #810D0D to #2590A3.
Due to this adjustment layer you’ve already seen the red and blue color in the final outcome of the tutorial. So it’s going to lay the foundation of final colors now. If you want the different colors then just try to add different colors to get the result of your taste.
You can see the setting in below image.
Color settings of Gradient Fill:
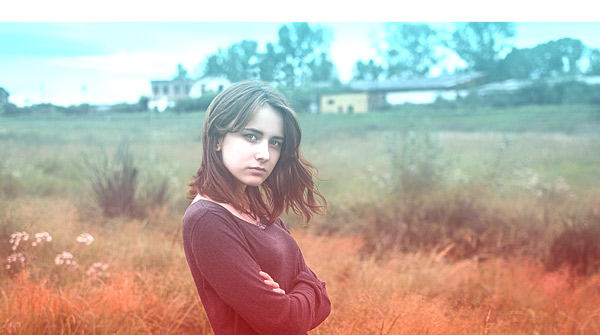
Set the blending mode of the Gradient Fill to Linear Dodge 100%. Here are the results with colors added to photo:
Step 4
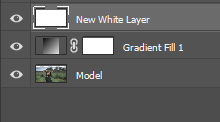
Create a new layer and fill this layer with white color. You can fill the layer with white color by selecting Edit > Fill choose white in the drop-down list.
Remember if you want a different color then you can change the color according to your taste but I like the white. Not only color you can add a watercolor texture here as well if you like.

Here you can see how the layer panel is arranged:
Using the Paint Splash Brushes
Step 5
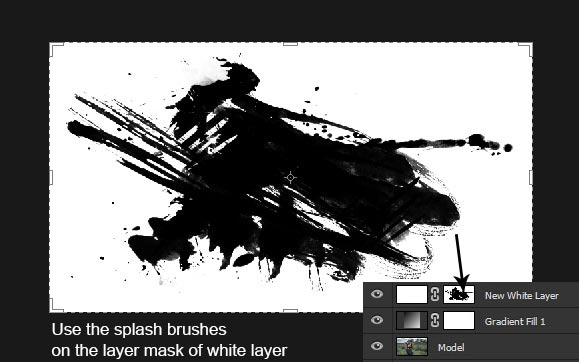
Download the paint splash brushes and load them into Photoshop. Add a mask to newly created white layer by clicking on the second button at the bottom of the layer panel. Set the foreground/background color to default black/white by pressing (D) on the keyboard.
Use any of paint splash brushes and then paint on the layer mask of the new white layer with the black color to reveal the model.
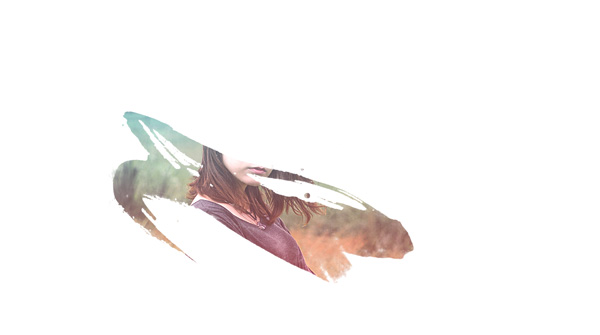
Here is the first stroke of the brush and you can see the model is now started to appear:
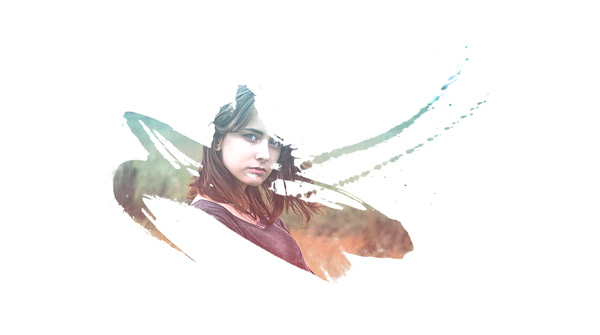
Make another brush stroke but choose different splash brush:
Continue revealing the model with different brushes. Try to use different brushes there are many and just do it freely and try to achieve the random effect by selecting different brushes and then apply them on the layer mask.
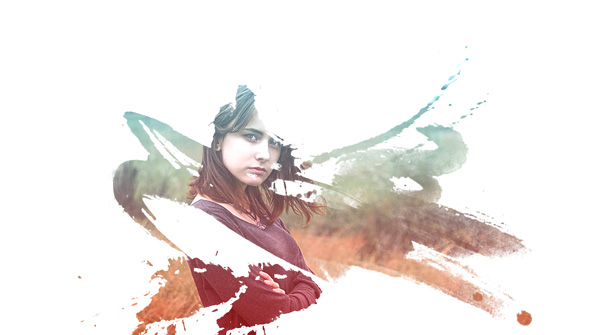
Similarly, I used many brushes to reveal the model layer.
Here you can see my results after using splash brushes:
Here are the results on the layer mask of the white layer which we created in step 4:
Step 6
On a new three separate layers, I painted some colorful light. You can see the three brush strokes with dark red, blue and green color. All painted using soft round brush with 100% opacity and flow. You can also paint the colorful lights on a single layer but I want to keep them separate.
Set the blend mode of each layer to Linear Dodge
and lower the opacity to 70%. Feel free to set the opacity according your way.
Final Adjustments
Step 7
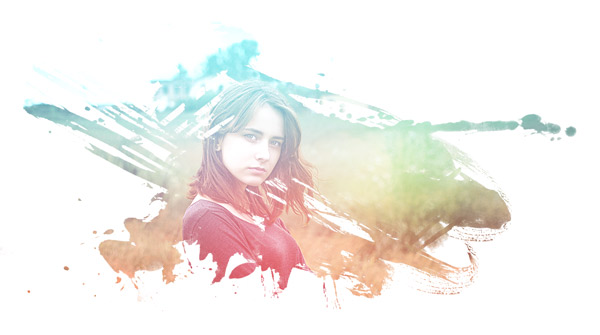
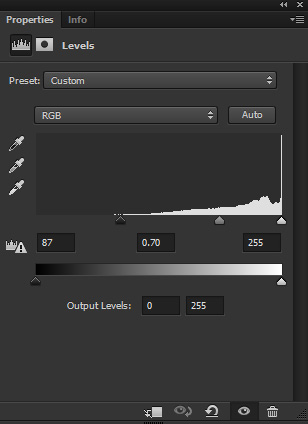
I increased the contrast of the image using Levels adjustment layer. Create a Levels adjustment layer and use the following settings to increase the contrast.
Here are the results:
Step 8
To finalize the effect, we’ll apply the Dry Brush Artistic filter. In order to do that, press CTRL + SHIFT + ALT + E to create a single layer of all layers and name it ‘watercolor’.
Select the watercolor layer, now to go to Filter > Gallery > Artistic > Dry Brush and set the setting as shown below.
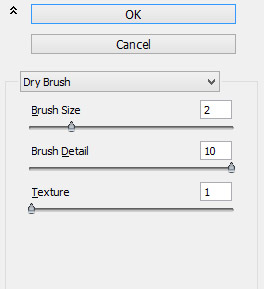
I reduced the watercolor layer opacity to 70% to subtle the effect of Dry Brush filter.
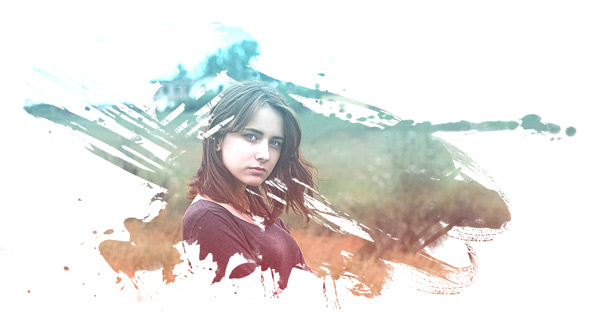
Here we’ve our watercolor effect:

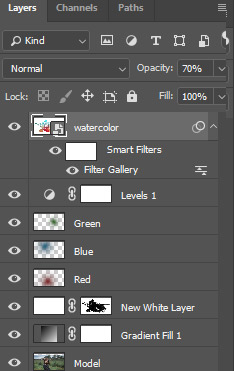
Here how my layer panel is arranged:
Conclusion
To replicate a watercolor effect, you can use the combination of filters, watercolor brushes and textures like I showed you in this tutorial. I hope this tutorial will help and let me know if you have any thoughts.
Need Help With Photoshop or Looking for Professional Support?
Whether you're just getting started with Photoshop or need expert-level assistance, we're here to help! Contact us for personalized Photoshop tutorials, project support, or creative services.
Get in touch today to take your skills or projects to the next level.
CONTACT US NOW📘 Want to Master Photoshop Faster?
🎁 Get Your FREE PDF E-Book "Top 10 Photoshop Tricks Every Designer Must Know" Now – Packed with expert tips, shortcuts, and techniques to boost your creativity & workflow.
👉 Download Your FREE PDF E-Book NOW!

