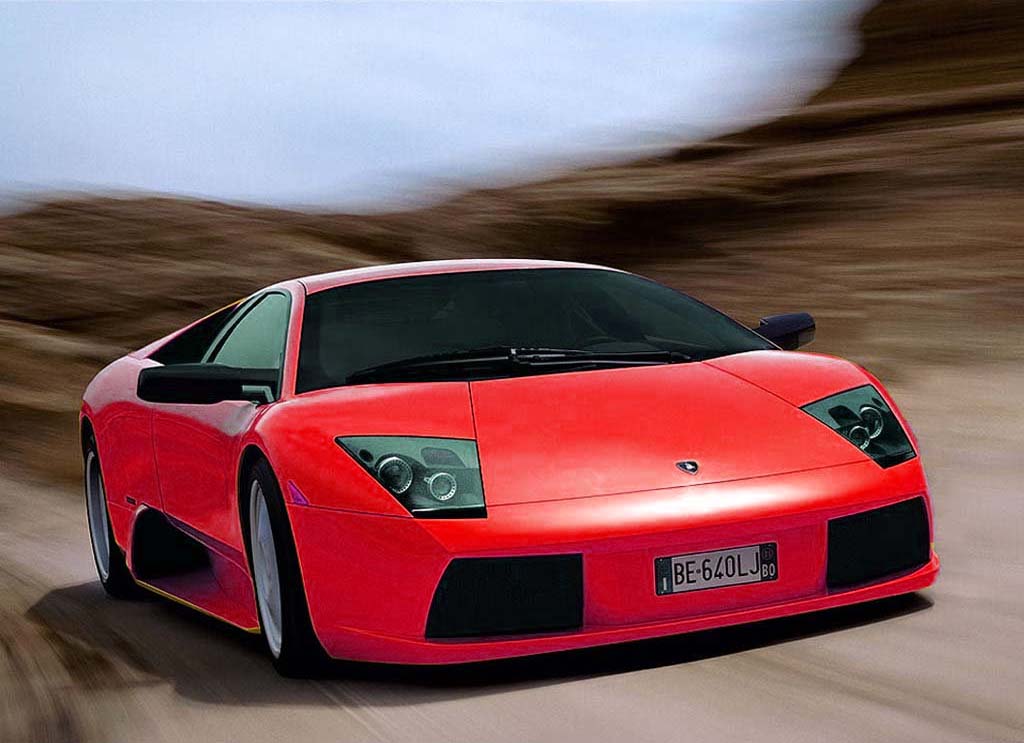
Yes, I’m sure one of the top reasons for people needing to use Photoshop is to change the color of a certain object. And that’s what I’ll be showing you now! Let’s start!
Preparation:
Have your image ready in Photoshop by going to Menu Bar: File > Open > select image.
This tutorial was done on Adobe Photoshop CS5. Other versions may vary slightly.
Step 1:
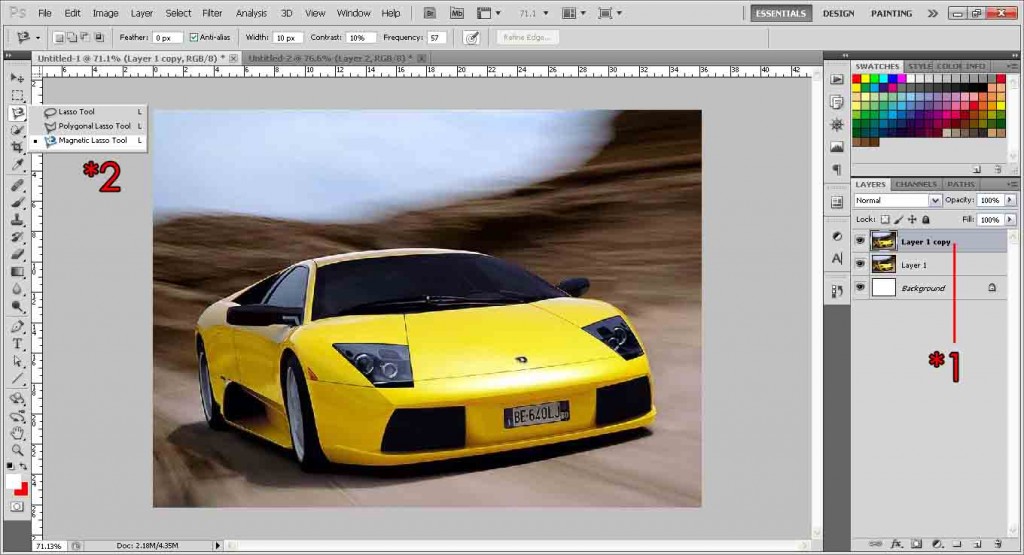
Let’s duplicate the layer as a safety step. Right-click the image layer and Duplicate Layer, or press Ctrl+J or Cmd+J.
Step 2:
Select the Magnetic Lasso tool (see above picture for reference for where the tool is) and start drawing an outline around the image you want to change color. What the Magnetic Lasso tool does is it will try to differentiate between the pixel colors and form a ‘magnetic field’ which will somewhat outline the object, but it really depends on the photo. It works best on high contrast images as the pixels are easily differentiated. Click once to add a dot, and double click to end the path anywhere anytime.
If you need top precision and accuracy, I suggest using the Polygonal Lasso tool (same tool button as the Magnetic Lasso Tool, just above it actually. See the example for reference). It works the same way as join-the-dots, just click and form a dot, slowly outlining your image. You will have more control and accuracy with this method, but will take a longer time too. The choice is yours.
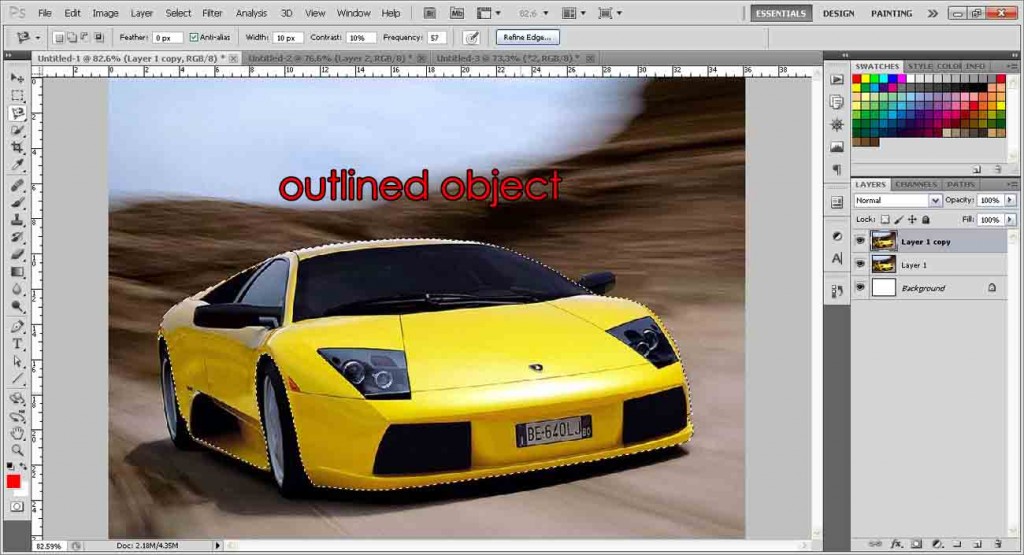
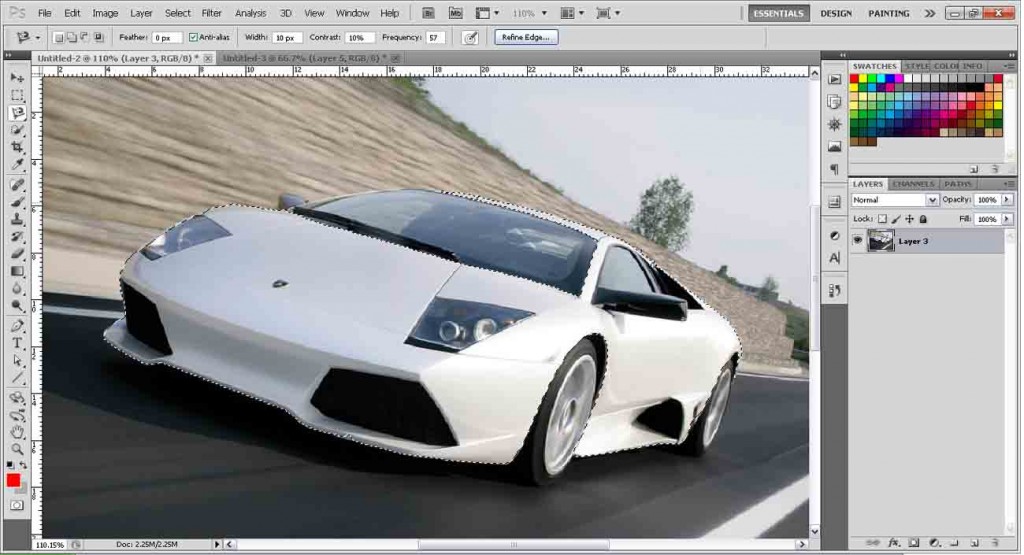
After you have properly outlined your object, it should look something like this. There will be a dotted outline around your car.
For more info on outlining, click here.
Step 3:
Press Ctrl + J or Cmd + J, and it will copy your selection and paste it in a new layer for you which should pop up at the top of the layers. You might want to duplicate this layer too, just in case something happens to your layer, you don’t have to go through the hassle of outlining the whole object again. Always have a habit of making a spare of whatever ‘hard work’ you have done, or at least save once.
Step 4:
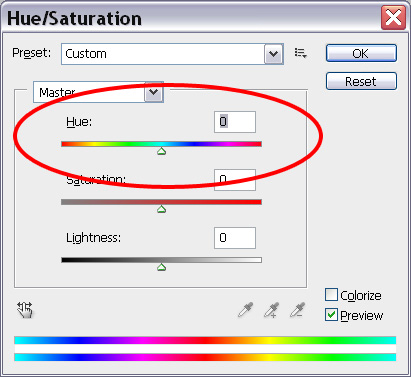
Go to Menu Bar: Image > Adjustments > Hue/Saturation. You will see the Hue/Saturation box pop up. Drag the slider under at the Hue setting to change to the color you want. You may adjust the saturation and brightness too but there shouldn’t be a need to.
Check out my awesome new red car!

What If My Object Is White?
If you tried to follow this tutorial with a white object, you’d notice that it doesn’t work very well. That’s because we were changing the color based on Hue/Saturation settings. In simple words, Hue refers to a pure color, or an element in the color wheel. Since white is not a ‘hue’, almost nothing happens when we edit it. So I’ll teach you how to fix that in a second, but it’s gonna be much more challenging to do so. Note: This is the way which I found to be the best that works for me, that might be other ways to do it, but I’ll be explaining the way I know how.
Step 1:
First, repeat all the steps above, until you reach the Hue/Saturation box. However, during the part when you are drawing the outline, try not to include any parts that you don’t want to color, if possible. I’ll explain why later. As you can see in my example, I’ve managed to leave the windscreen out. It’s okay if you don’t leave out those parts for now, we can still delete them later on. This time, I used the Polygonal Tool, as white can be hard for the Magnetic Tool to contrast and you will have a harder time getting the outlines.
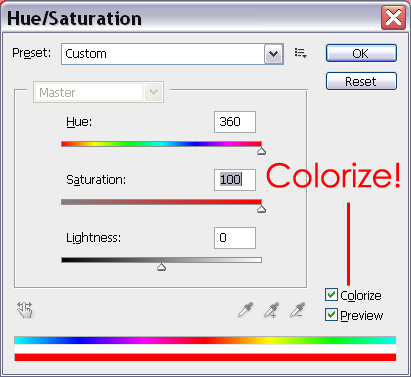
Once you reach the Hue/Saturation box, this time tick the Colorize and drag the hue to the color you want. If it’s still too light, try to increase the saturation. The problem with Colorize is that it will color everything, including the non-hues (black/white), so that’s why we didn’t want to select any black/white areas. In this example I will be maxing both Hue and Saturation. Mine now looks red like that. Depending on how you want your picture, if it looks good enough for you then save it. For my example I’ll be attempting to make it a full solid red, as it would look like in real life.

Step 2:
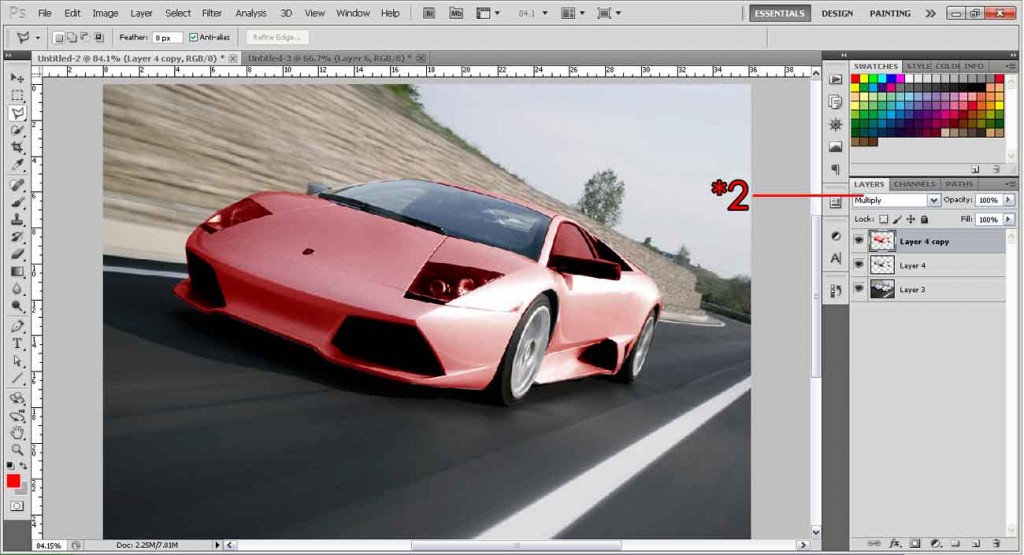
Change the blending mode to Multiply.
Step 3:
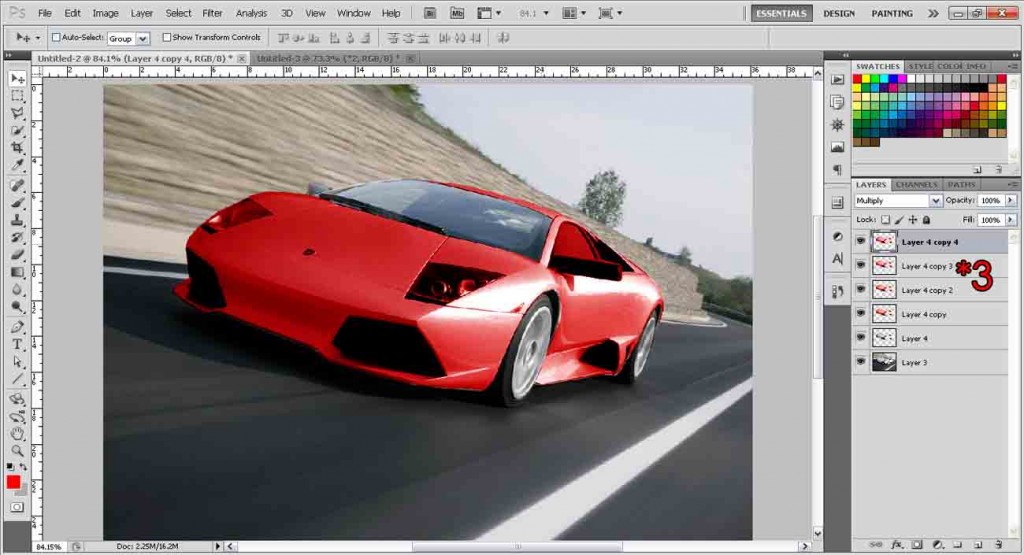
To make the red darker, we simply duplicate the layers until we get what we want. Right-click the selection layer and Duplicate Layer, or press Ctrl+J or Cmd+J. For my example, I duplicated the layer 4 times to get the effect I wanted. As you can see, it’s now a nice red, a far cry from the white we had. But so are the headlights, windows and side mirrors. We’ll deal with that in a moment.
Step 4:
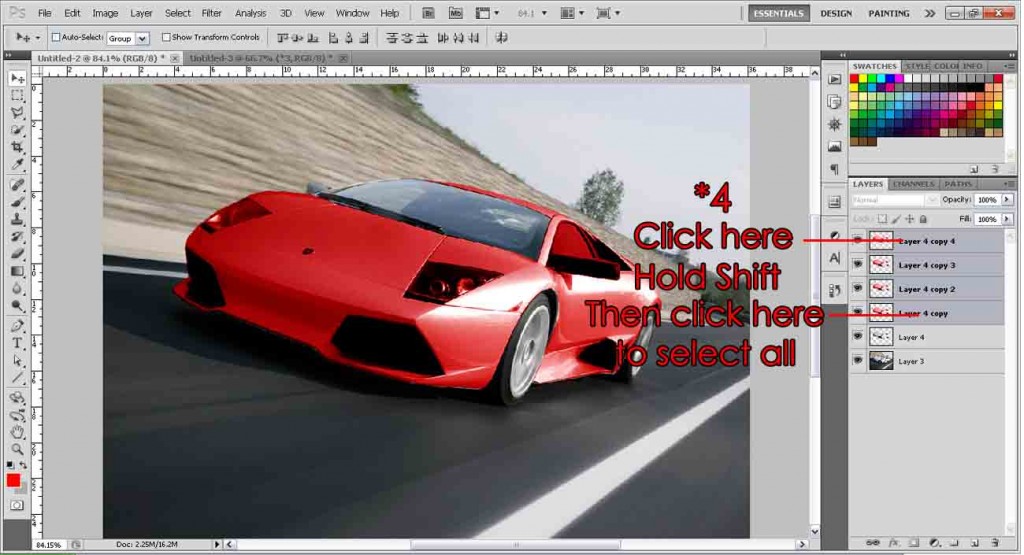
First let’s merge all the duplicated layers into one. Click the top layer, hold shift, and click the last duplicated layer. You should have selected all the layers. See the example below. After that simply right-click, and Merge Layers. The layer might jump back to normal mode, so simply change the blending mode back to Multiply.
Step 5:
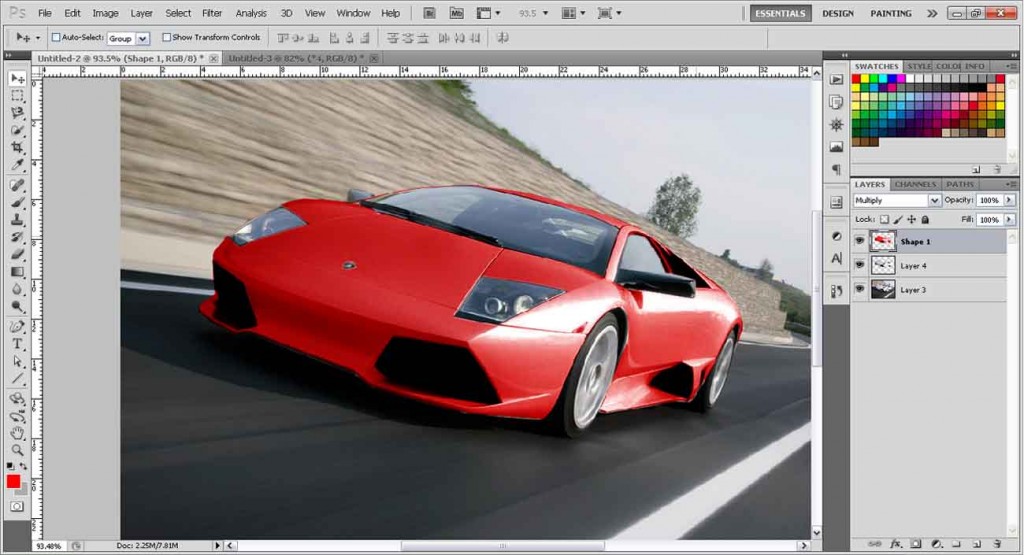
Alright now to fix those headlights, as well as any other parts that we do not want red like the car logo, window, etc. There are a number of ways to do it, from using the eraser to erase, or using the magnetic/polygonal tool to select the parts out and deleting it. I’ll be using the Magnetic Lasso Tool this time to select out those parts, and then deleting them from the red layer. Simply outline those parts, and after you made the selection, press Delete. After removing those parts, my image now looks like this.
Step 6:
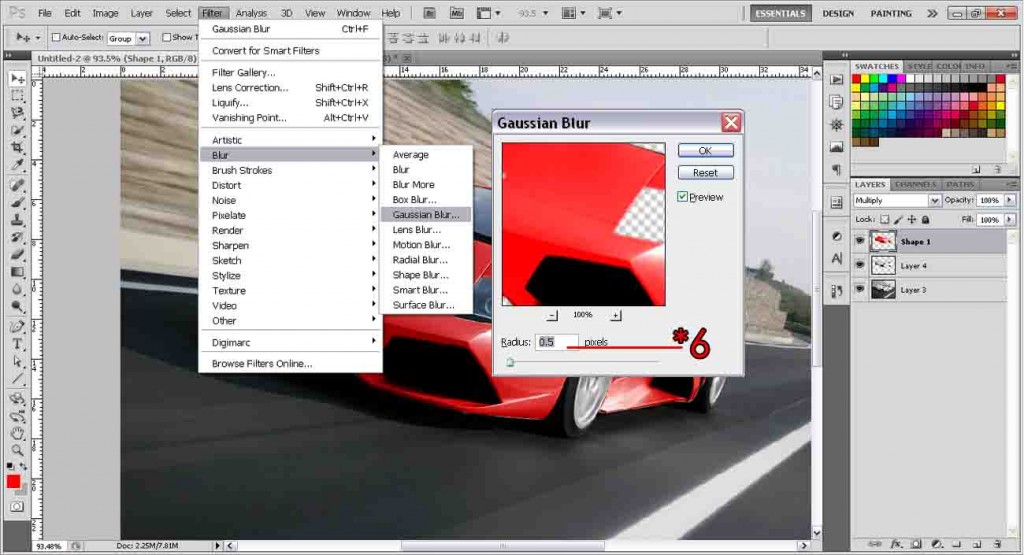
Looks pretty good eh? Now we just add a Gaussian Blur to make it look more natural. I’ll be using a 0.5 setting but everything is up to you.
And the final product… !

If you want to know how to change the color of an object to white, go here.

