This tutorial is very important, and almost essential in most Photoshop situations. You will find that in many situations, you may want to change the color of a certain object in a photograph, or you want to crop out a single object from a poster. The trouble is that although we can see and differentiate the object that we want, the computer cannot. It’s a single image file to them. So what do we do? We simply have to outline out the object that we want, and save it as another image file so the computer recognises it. We can then do whatever we want with our outlined object, from changing its color, to transforming it, etc.
There’s a number of ways to outline your object, and depending on your photo/image, there are obviously preferred methods for each.
NOTE: After you have selected your object using whatever means, you may duplicate the outline and turn it into a layer, so that you can further edit it, or save it. After your outline is completed, simply press Ctrl+J (Cmd+J) to do so.
IMPORTANT: Before outlining, make sure you have selected the correct layer that you’re outlining on. If not when you try to duplicate the layer, it will duplicate the outline, but of another layer that you have selected previously.
1. Lasso Tool
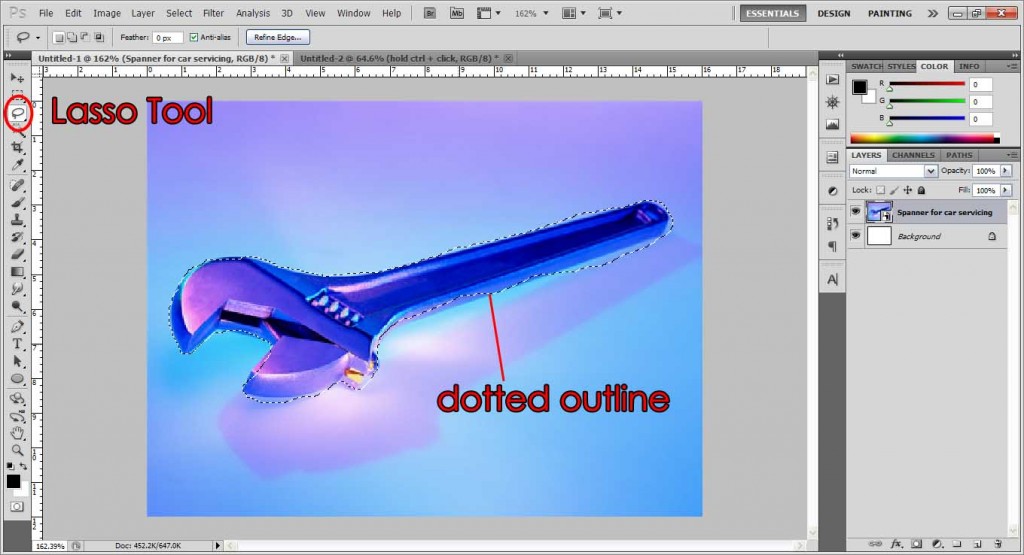
First, there’s Lasso Tool. How it works, is simply you draw the selection around whatever you want to outline. I don’t really recommend this method if you’re using a mouse, as it can be rather unsteady and you will have a hard time outlining your object. However if you use a tablet, feel free to ‘draw’ around your object. As you can see, my outline isn’t very precise haha.
2. Polygonal Lasso
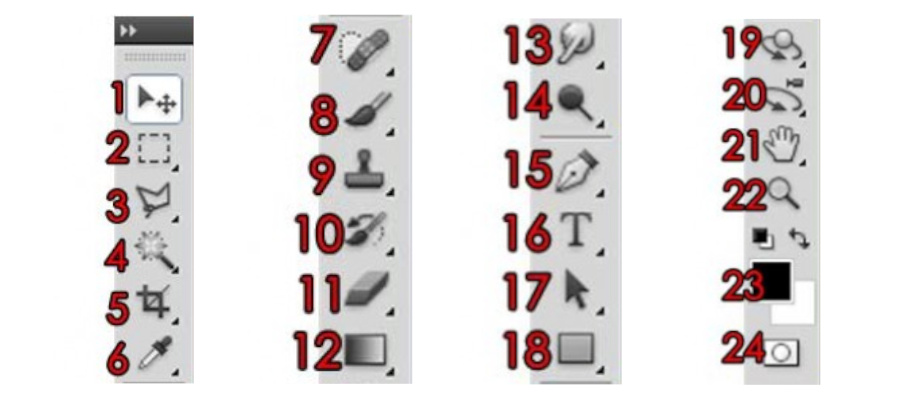
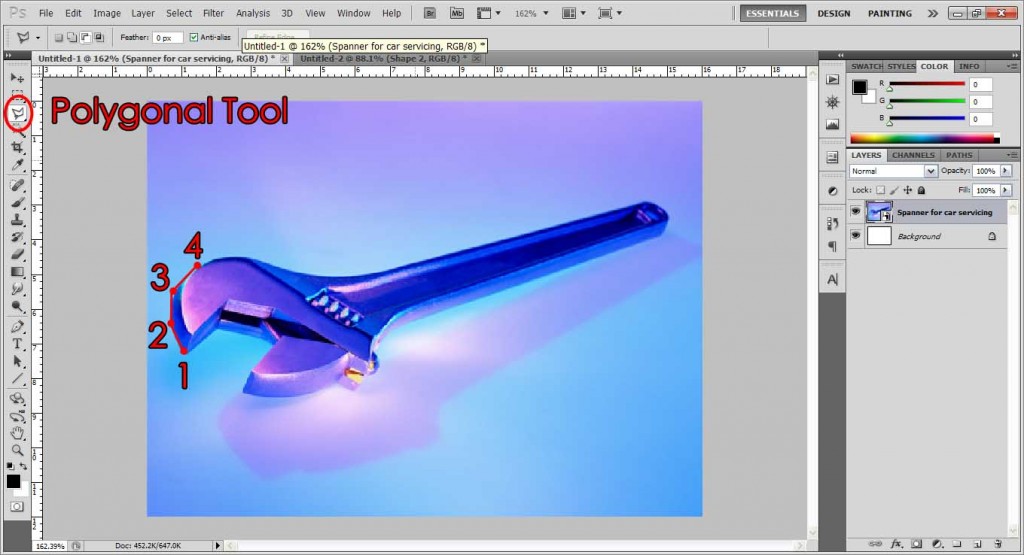
Next we have the Polygonal Lasso Tool. If you don’t see it, simply hold the Lasso Tool down to show more selections, and choose Polygonal Tool. I tend to use this method alot, as it gives me the most precision. How it works is very simple, you simply ‘join-the-dots’. Every time you click, you form a dot, and the next dot you click, forms a line between the two dots. In a nutshell, just dot around the image you want to select. It can take longer than other methods, but definitely gives the most accurate outline. When you join the last dot together the outline will be formed.
3. Magnetic Lasso
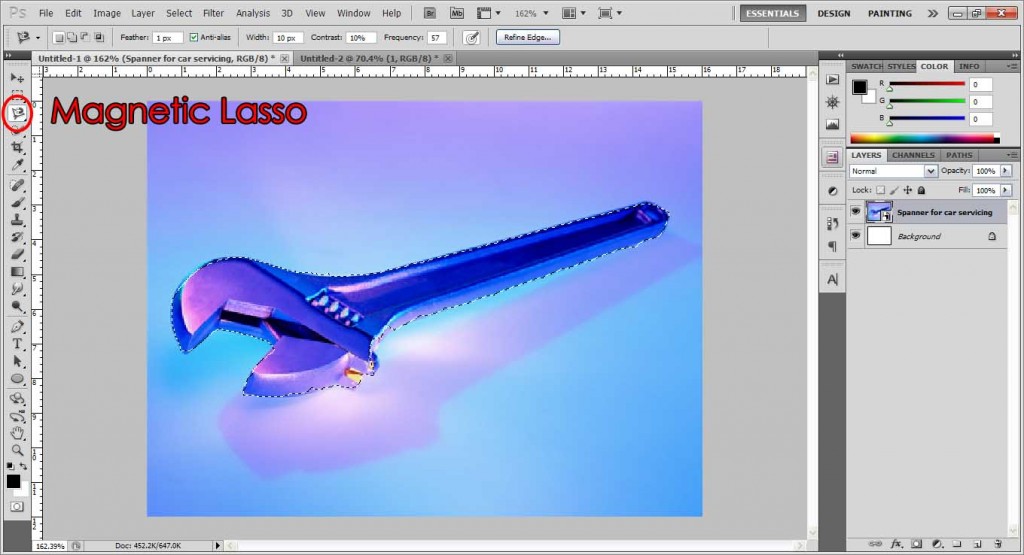
The Magnetic Lasso isn’t too bad. How it works is that it tries to be smart and predict the outline, based on the contrast and color differences. So like you had a black object against a white background, it can easily outline the object as you drag around it, ‘sticking’ to the object sides like a magnet, hence its name. Obviously, works pretty well on high contrast backgrounds, and not very well on objects with same color/tones/contrast as the background. You can also change the contrast and frequency settings at the Options Toolbar for it to work better, but I just usually go with the Polygonal Tool. The good thing is that it’s much faster to use! Not too shabby, give it a try!
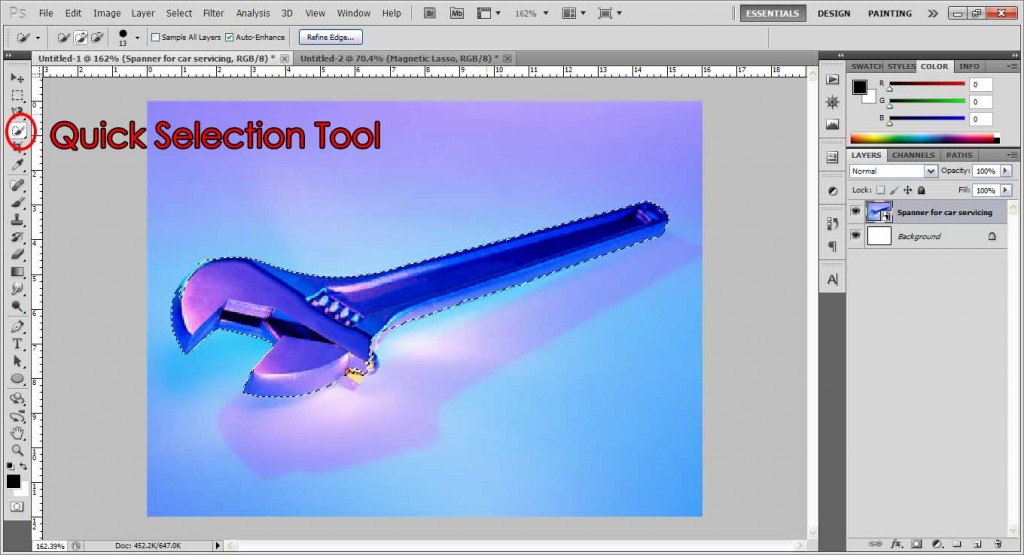
4. Quick Selection Tool
The Quick Selection Tool is also another great tool for outlining. As the name suggests, it’s supposed to help you select stuff quickly! It kinda works the same way as the Magnetic Lasso, except it doesn’t stick to the edges, but rather, it groups up the selection. So in essence, you simply ‘color’ over the object in hopes that the tool selects exactly what you want. If it over-selects some areas, you can simply hold Alt and drag it back. Holding Alt just makes it unselect rather than select, so you ‘minus’ away the parts you don’t want. As you can see, not a bad selection done using this.
Check out the more in-depth tutorial for Quick Selection over here.
5. Magic Wand
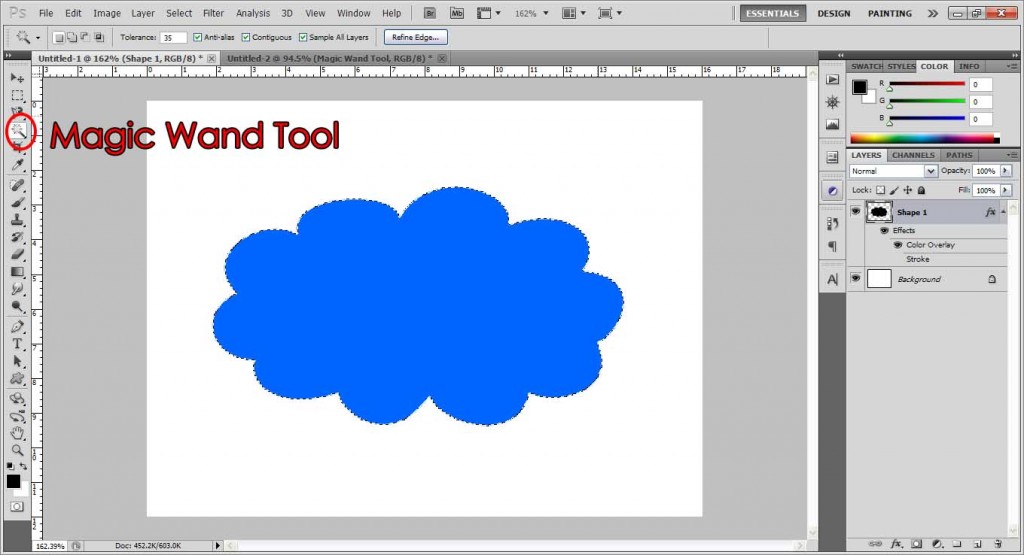
Lastly, we got the Magic Wand. The Magic Wand is not really solely intended for this purpose of outlining, but it can be a VERY quick way to do so, in the right situations. The Magic Wand simply selects all pixels of the same value that you have selected. In layman terms, if you select a shade of blue, anything else that is about that shade of blue gets selected in the picture. Needless to say, the Magic Wand works well on objects with solid color.
Let’s take a look at the blue cloud below. Lots of curves and it would take some time to outline it using Lasso tools. But with Magic Wand you only take a second! Simply select the Magic Wand tool, and click on the blue cloud. The whole cloud will be instantly selected!
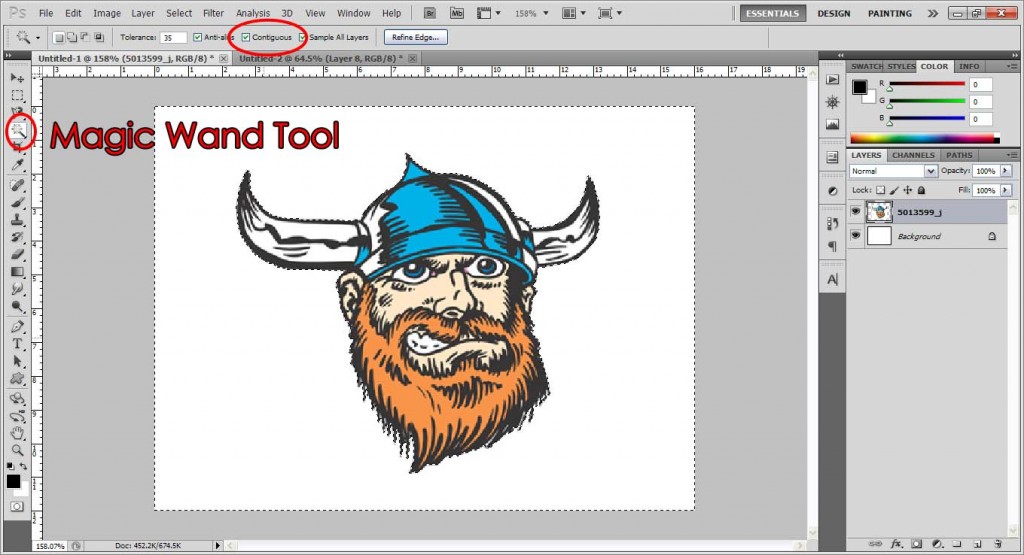
Another trick to using the Magic Wand is also if you need to outline an object which has many colours, and is relatively hard to outline, BUT is on a plain background. In this case, we want to outline the Viking’s head, but that seems quite a tough one eh? Not so, if we use this shortcut method. Using Magic Wand, click on the background white to select all the background white. Make sure Contiguous is checked, so that the whites inside the Viking’s head do not get selected too. You can see the dotted line around the white canvas, which means we’ve outlined the background.
Check Contiguous = Select same color in the AREA
Uncheck Contiguous = Select same color EVERYWHERE in the whole image
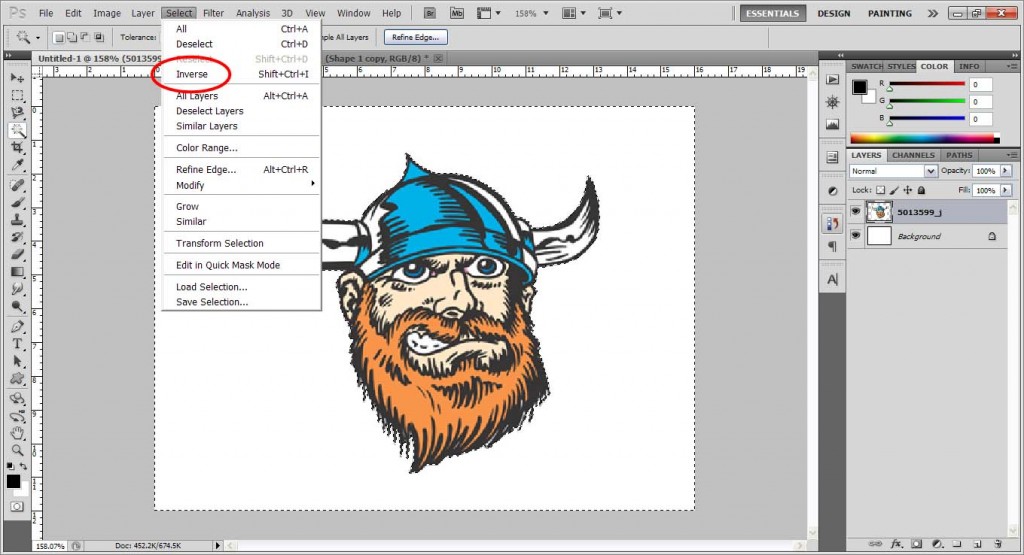
Next, go to the Menu Bar: Select > Inverse. What this does is basically, taking the selected background, and turning it inside out, and inversing it, so we get the selection that was previously unselected, or ‘inside the background’. I hope that wasn’t too hard to understand. You can see after doing that, we now have the selection outline of the Viking’s head. And all done in less than a minute!
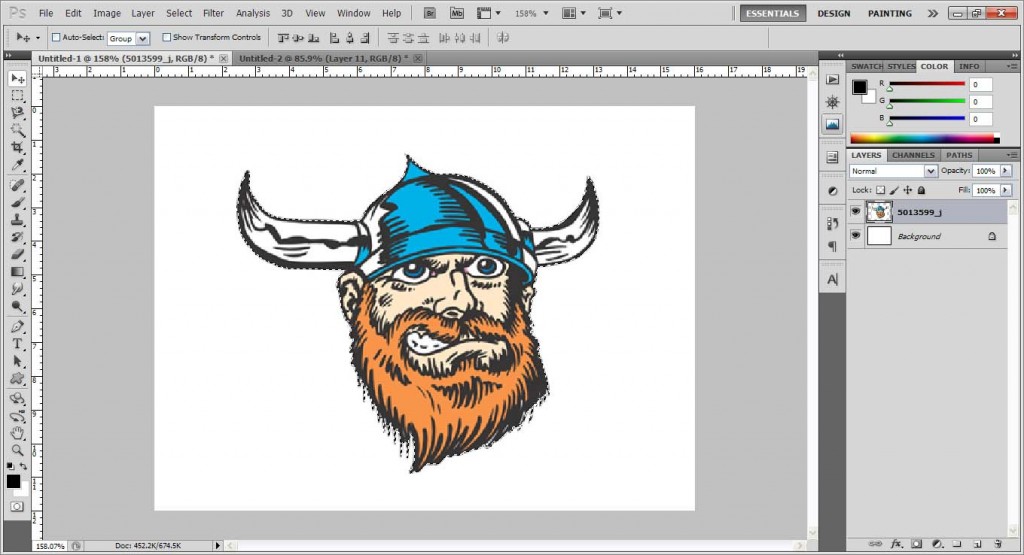
That’s all folks, and these are just a few of the many ways to outline an object in Photoshop! Just remember to ‘save’ your outline (Ctrl+J or Cmd+J) when you’re done, and you can carry on editing from there!
Check out the tutorial for outlining and saving over here!
