
Ever wondered how do you cut out an object from an image, but yet don’t show the ‘canvas’ or white square background? This is probably one of the most asked questions regarding Photoshop, and a very good one too. It’s because of this ability that makes Photoshop so powerful in image editing. Even for myself, I had also wondered how do you get rid of the background of objects, especially for T-shirt printing, since you don’t really want the background to be printed too!
Preparation:
The first step is to get your photograph ready in Photoshop. You can drag it into Photoshop or just go to File > Open > your photo.
This tutorial was done on Adobe Photoshop CS5. Other versions may vary slightly.
Step 1:
Okay so depending on the picture you have, and the object you want to outline, the difficulty varies. Let’s take a look at my example, today I’ll be outlining and extracting out the family of four. First things first, make sure your layer is Rasterized. It simply means in raster form (dots or pixels), not vector. To check, just right-click on your photo’s layer. If the Rasterize Layer is greyed out means you’re good. If not, select Rasterize Layer!

Step 2:
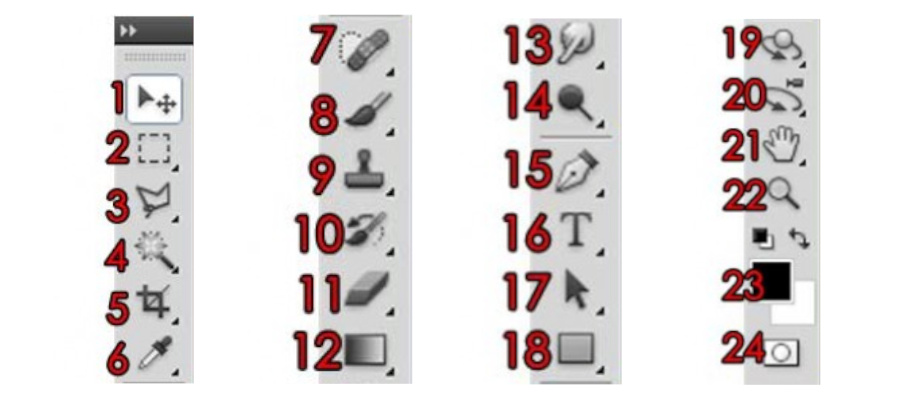
Now we have to outline out the object, in this case, the four people. If you haven’t read the Outlining Object guide, please do so and then come back here. I’ll be using, as always, the Polygonal Lasso Tool. Remember to zoom in and out to make your outlining life much easier and accurate! It took me about a good 5 minutes to outline this, and after outlining you should get a nice dotted outline like this.

Step 3:
Next, while making sure the photo/image layer is selected, press Ctrl+J (Cmd+J). This will copy out the outline, and paste it into a new layer, as you can see in the example below as Layer 2. Notice how it only shows the four people in the thumbnail but not the background? However we see no difference in the main image, as the outlined layer of the four people simply overlaps the background, which are the same four people, so obviously you won’t be seeing any changes.

Step 4:
Now things are starting to get fun! To view the outline object on its own, simply delete or hide the original background image. I recommend just Hiding as you never know when you might need the original image again. Hide the original image by clicking the ‘eyeball’ as shown in the example. You should see your image on a white background now! (assuming that when you first pasted the original photo there was a default background of white already)

Step 5:
If you like to save your image on a white background as it is, then go ahead! (If you don’t know already, Menu Bar: File > Save As.) Otherwise, let’s put the object on a transparent background! Simply hide the white background again by clicking the ‘eyeball’. You should see a background of white-and-grey checked squares now. Don’t be alarmed, it simply means the background is transparent. Those squares won’t appear after saving the image.

Step 6:
Next, I simply use Trim to cut down the canvas size for easier movement and viewing. It simply ‘auto-cuts’ everything away to the very edges of the object. Go to Menu Bar: Image > Trim. I’m gonna be cutting from all sides, so I’ll check Top, Bottom, Left and Right.

And we get something like that.
Step 7:
Oh my, I almost forgot one important part! See that small ‘hole’ with the background in the right arm of the lady? Yup, that part isn’t ‘deleted’ as during the outline, we outlined only the exterior parts of the object. There’s a tiny part over at the left hand of the guy too. To delete those, simply outline the hole and press delete! Simple! Just remember again, to make sure that the objects layer is selected, and then outline and press delete, otherwise nothing will happen. Or if you want, you can also use the Eraser to manually erase off the background.
Step 8:
Now you can save your image! Please note you can only save it as a gif or png file, as only these two formats support transparency. If you save it as a jpeg, you will still end up with a white background. Gif is recommend for web use, or images with few colors. For photos or images with many colors, use png. After saving you can simply drag or place this image into other backgrounds or photos that you might want to edit. As the background of this image is transparent, you can place it anywhere on any other photo and it will just be ‘super-imposed’ on the picture.
End result (the background looks white because of the website’s white background, but it’s just transparent):

Playing with it, I can just put it in another background, like THIS! Good for making posters or banners, or whatever you may need.

That’s all for now, and hope you have learnt something new today! Play around with the various outlining techniques, as well as imposing on different backgrounds to get some laughs!